This article/tutorial is for those people who use more than one computer at their desk and have to juggle through the stack of mice and keyboards to find the correct one.
With Synergy, redirecting the mouse and keyboard is as simple as moving the mouse off the edge of your screen. Synergy also merges the clipboards of all the systems into one, allowing cut-and-paste between systems. Furthermore, it synchronizes screen savers so they all start and stop together and, if screen locking is enabled, only one screen requires a password to unlock them all.
System Requirements
- Microsoft Windows 95, Windows 98, Windows Me (the Windows 95 family)
- Microsoft Windows NT, Windows 2000, Windows XP (the Windows NT family)
- Mac OS X 10.2 or higher
- Unix
- X Windows version 11 revision 4 or up
- XTEST extension (use “xdpyinfo | grep XTEST” to check for XTEST)
- All systems must support TCP/IP networking.
Setup
It is recommended to share the keyboard and mouse of the system whose display is in the middle of all the displays on your desk. That way, it is easier to move your mouse pointer around different screens. In a 2 system setup, use the keyboard and mouse of the system on the left. If you have a lot of monitors, you can also go vertically.
Download
Download Synergy from here and install it on ALL the systems.
Configure Synergy
- Start Synergy on the system whose mouse and keyboard you want to share.
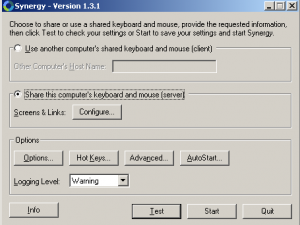
- Select “Share this computer’s keyboard and mouse (server)” and click “Configure”.
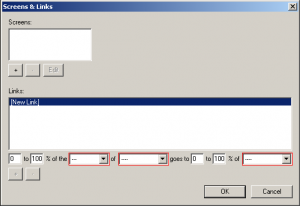
- Now we need to add the host screen. Click on the “+” button under Screens.
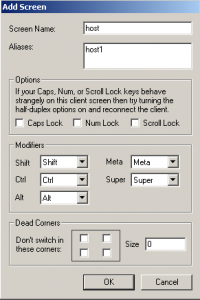
- Enter the computer’s name (or IP address) under “Screen Name”. Enter an alias. Note that these 2 fields cannot have the same value. It is also recommended to use computer name instead of IP address for better readability and management. Click “OK” when done.
- Click on the “+” button under Screens again and add client systems.
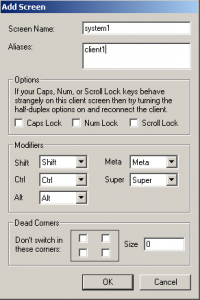
- Repeat step 6 for all the client systems on your desk.
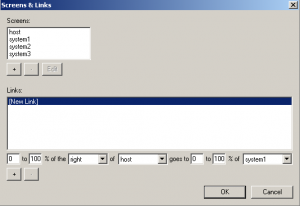
- Let’s link the screens. Select [New Link] option under Links. Now specify the position of screens on your desk relative to one another. For example – if system1 is to the right of host, here is what the setting should look like:
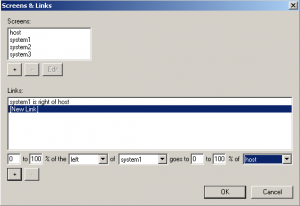
- Note that it is important to specify the links both ways. So, if system1 is to the right of host, you also have to specify that host is to the left of system1:
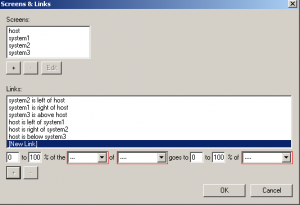
- Repeat the above steps for all the screens.
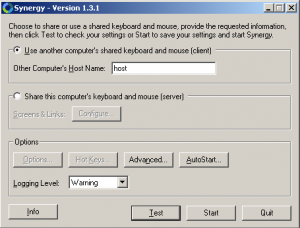
- This will setup your host machine. To configure a client, you simply have to start Synergy on the client system and select the option “Use another computer’s shared keyboard and mouse”. Enter host computer’s name or IP address.
- Once you are done with configuration, you can test it out by clicking on the “Test” button on all the machines.
- Once you are satisfied with the testing, you can run the program by clicking on the “Start” button. The Synergy icon in the system tray will change showing that it is connected to the clients.
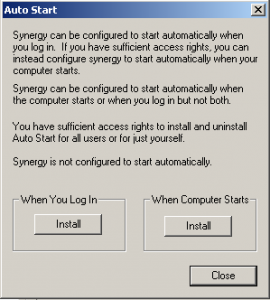
- You can configure Synergy to Auto Start during operating system. Click on Auto Start and choose to start it at windows logon or at system startup.
That’s it! You can now use a single keyboard and mouse across all the computers on your desk and get rid of all the cable clutter and juggling through the stack to find the right one.


