It just doesn’t take good quality components to build an awesome entertainment setup. The placement of the components and their calibration play a lot of role in enhancing the overall experience. In part 2 of our guide to build an entry level Home Theater & Gaming System, we tell you how to setup the components you purchased in part 1 for optimal use.
Screen
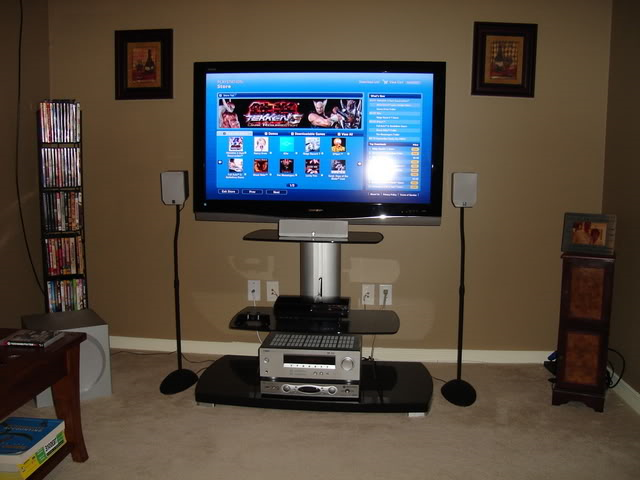
As with movie theaters, the best seat is directly in front of the middle of the screen. Place the screen at such a height that it lies straight in front of your eyes most of the time. If you are gonna sit on a couch, look for a stand/trolley a little higher than your coffee table. If you are installing it in your bedroom, something around the height of a typical computer table should be perfect (albeit you might want to buy something shorter if you have those new style low height beds).

Notably, typical wooden computer tables (like the one pictured above) sold in India make a great station for Home Theater components in a bedroom. Such tables cost somewhere around 1200 – 1500 INR and provide ample room to place your TV (on the top), gaming console (in the CPU’s place), A/V receiver (in printer’s place) and UPS. You can also place your DTH set top box on the keyboard drawer (assuming that you throw away your DVD player upon buying the gaming console).

Most LCD TVs today have a plethora of connectivity options. Make sure you connect your console/player via an input which supports HD signals. These are HDMI, RGB, component & S-Video. It is not necessary to route the video signals through your AV receiver unless you have one which will actually enhance those signals. If you are using a gaming console, just connect it directly to the TV.
Speakers

The placement of the speakers have a huge impact on the overall listening experience. A typical mistake which everyone makes is mounting the speakers at a height. For optimum listening experience, the speakers should be at the same height as your ears. Floor stands are recommended if you have space for them in your room. Otherwise, wall mount them at no more than 1 – 2 inch above the usual height of your ears when you sit on the couch/bed.
Make sure not to place the speakers in enclosed spaces like cupboards, otherwise you will hear a lot of reverb (unless you have high end systems like Bose Lifestyle which automatically calibrate the sound). Also, install the speakers in such a way which ensures that they are pointing toward you.
The center speaker plays a critical role in 5.1 setup. Do not place it at the back of the screen. Place it either just below the screen or wall mount just above the screen.
The subwoofer should go on the floor. Placing it on a light surface will result in movement due to the vibrations. You can place a floor mat on the floor and place the woofer on the top to prevent it from moving due to the vibrations.
Receiver
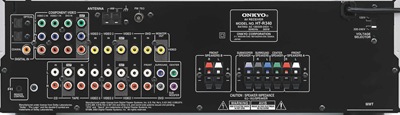
The receiver should be placed near all the other gadgets so that it is easy to connect the components. If you are using HDMI cable, one cable will transmit HD video and Digital audio. You can then route the HD video to your TV using a component cable.
An alternate setup is to directly connect the playback source to the TV using RGB or component cables for video and routing the audio to the receiver through TOSLINK optical or S/PDIF Coaxial cable. Note that there is no difference in sound output between optical and coaxial.
Once you have made the connections properly, it is time to calibrate the speakers. Most receivers have options to set the volume and delay for individual channels. While the default delay setting is good enough for most uses, you need to adjust the volume according to your position in the room. Increase the volume of the channel which is farther from your position. Adjust the speaker levels and modes according to the content you are watching. Some quick tips:
For listening to music:
-
Center: 0 *
-
Left and Right: 5
-
Surround Left & Right: 5
-
Subwoofer: 5
-
Listening mode: All channels stereo
For watching movies/playing games:
-
Center: 7
-
Left and Right: 3
-
Surround Left & right: 5
-
Subwoofer: Anything between 0 – 3
-
Listening mode: Depending on the source – Dolby D or DTS for 5.1 audio, Neo 6 Cinema or PLII Movie for Stereo.
For watching TV:
-
Center: 7
-
Left and Right: 3
-
Surround Left & right: 5
-
Subwoofer: Anything between 0 – 3
-
Listening mode: Unplugged or TV Logic.
The above settings & modes are for Onkyo receivers and might differ slightly if you have another brand. You can go ahead and try out different modes and levels to get to the best sound.
* It is extremely important to set the center speaker to zero for music playback. Doing so will not only decrease the sound coming from the center speaker, but will also slightly increase the signals in all the other channels, thereby enhancing the overall experience.
This concludes part 2 of this guide. In the next part we will see how we can stream HD content off our computers to gaming consoles and watch them in HD & 5.1 audio on the setup we have built.
